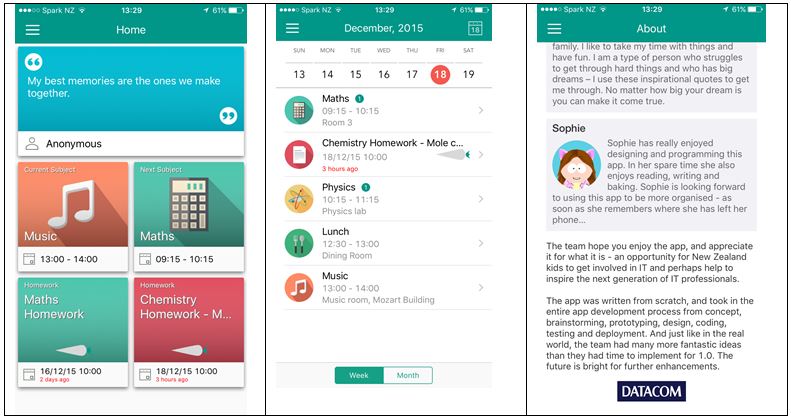
As described in my previous post here, I have been involved in a schools mentoring programme to help expose kids to software development. The New Zealand Techhub Schools IT Challenge started last year in Wellington, and this year has rolled out on a larger scale across the major population centres of the country. The 2015 winners went on to create a shipping mobile phone app with the help of my employer, Datacom. I was fortunate enough to lead that development team, where we took the core ideas of the winning team, and with their help created a brand new application in just a few weeks. Go here if you want to see earlier articles for links to both the iPhone and Android versions.
Now before you start to get the idea that a big corporate was exploiting the ideas of school children, I should mention that:
- the apps are free;
- IP remains with the school;
- this was an investment by the company in people and resources worth tens of thousands of dollars.
The team got a lot out of it personally, and genuinely got a buzz out of teaching the three girls about software product development and programming. It was satisfying for everybody to take some raw ideas and turn them into shipping code.
A word about the winners. From St Mary’s College for girls in Wellington, for the competition they had to start from nothing, come up with some ideas, and implement what they could using MIT’s AppInventor – more on that later. Other schools in the competition had boys teams, and the stereotypical expectation might be that the boys would win given the much higher proportion of males in the IT workforce. So it was very pleasing to see the girls not only being right up there with the boys teams, but grabbing the prize too.
All of the above is a bit of a long winded introduction to the point of this post. The choice of tools the competitors used was down to the individual schools. The organisers recommended a number of alternatives, but did not dictate any specific platform or technology. One of the options was MIT’s AppInventor. Originally created by Google, the Massachusetts Institute of Technology now maintain and promote it as an educational programming tool to create Android based mobile applications. The school I was mentoring at, St Mary’s College, decided that all teams from that school must use it. For me to be most help, I decided I really ought to learn it too.
I am an experienced developer, and always up for learning new stuff. I have done some iOS programming, but Objective C or Swift and full IDE is a different kettle of fish to a web based graphical programming tool. So I spent some time doing various online tutorials, and this armed me to help answer questions from my teams.
But I would sometimes get questions from the pupils that couldn’t be answered immediately, or required more time and careful explanation than was available in the classroom. They were interesting real-world problems encountered outside the realms of existing online tutorials. I ended up answering these by preparing after class, and then writing something up. Over the next few weeks I intend to publish these notes and targeted AppInventor tutorials in the hope that they will be useful for others.
What is AppInventor?
AppInventor is a web based programming tool for creating Android based applications, and sharing them with others. The tool provides a screen designer that you use to assemble the buttons, text boxes, images, and various user interface components visually. You can customise the behaviour of the controls by writing code blocks. But rather than typing to a particular syntax, code blocks are assembled graphically and connect together using differently shaped connectors to enforce structure. The following example shows a typical code block:
This is an event handler for a sprite object called Ball1, which gets invoked if the sprite hits any edge of the display area. If it does, it calls a built in method of the sprite that makes it bounce of the edge, and then sets the colour of the ball to a random one chosen from a predefined list. All of these blocks are presented in graphical palettes that the user just drags and drops into their work area. Very slick.
To see your code running, you can launch an Android emulator on your PC or Mac. AppInventor connects to this, loads the code and executes it. Alternatively, you can also connect an Android device via USB or wireless, and the program will be loaded and run from there.
The beauty of AppInventor is that it provides instant gratification. In other words, it is incredibly easy to set something up, write a bit of code, and quickly execute it to see if it does what you expect. As you make changes, they are dynamically uploaded to the emulator, providing a quick feedback loop that is essential to keep young inquiring minds engaged.
I won’t go into more detail on AppInventor here as that can be picked up from existing online resources and my forthcoming notes. Give it a go and play!


