In 2021 I put together an action video of BMX racing here in New Zealand, made up of a combination of drone video footage and still images. You can watch it here on YouTube – recommend sound on:
While I have published videos before, these have been simple clips. This one, on the other hand, contained many different clips taken from my DJI Mavic Air 2 drone at the Kapiti BMX Championships in February 2021, and I mixed in a number of photos I have taken from similar events at the Kapiti track over the last few years just to mix it up a bit. I also put in a soundtrack and tried to make the visuals match the music.
This was a new experience for me, and one of my aims was to use this exercise to teach myself video editing. This post goes through some of the process, tools, and challenges I faced in being an almost total video editing beginner.
Flying with Permission
Kapiti BMX track is close to Kapiti Airport, and so I had to get permission to fly. Most air traffic is private light aviation, the odd helicopter, and a short haul passenger service. A phone call to the control tower was all it took – they were incredibly helpful. I was flying in a shielded location, which meant as long as I didn’t go over a certain height (about 30 meters) there was no clear unobstructed flight path between where I was flying and the airport. This safety constraint meant that in the unlikely event of a loss of control of the drone, it could not fly to the airport without hitting in this case trees or houses up on a slight hill. The Mavic Air 2 has an altitude limiter which meant I did not need to worry about accidentally flying too high.
I cannot stress enough the importance of ensuring you have permission to fly, especially near an airfield. In addition to the obvious safety benefits, ensuring ATC know of your plans means that if someone reports drone activity then the controllers won’t have to divert all air traffic while they verify where someone is flying. It will probably also save a visit from the Police.
Those of you who are familiar with drone flying in New Zealand may at this point be asking why I didn’t use the AirShare app to book my flight plan. This is an app by Airways New Zealand (www.airshare.co.nz), which lets you do an online application for flying in restricted areas. In this case I did actually use it, but there was no response to confirm or deny permission. Rather than just assume I could fly, I looked up the number of Kapiti Airport’s ATC and spoke to them on the morning – always good to have a backup plan.
My filming window was a couple of hours, and as soon as I landed for the final time a quick phone call to the control tower informed them I was done. Shortly after that I noticed planes started to fly much closer to the track, rather than doing a hard turn out after take off. This made me appreciate that air traffic control had been doing me a great favour to enable me to indulge in this drone shoot. Thank you Kapiti Airport!
Filming
I wanted to get some good dynamic shots of the racing, including trying to follow riders around the circuit. I soon discovered that following riders around and changing angles was a flying challenge, especially as I did not want to get too close and risk being a distraction. As you can see from the image below, I had a very tight area I could film in – just the track area. Add in the challenge of lampposts, telephone wires and trees, and you have a good recipe for crashes.
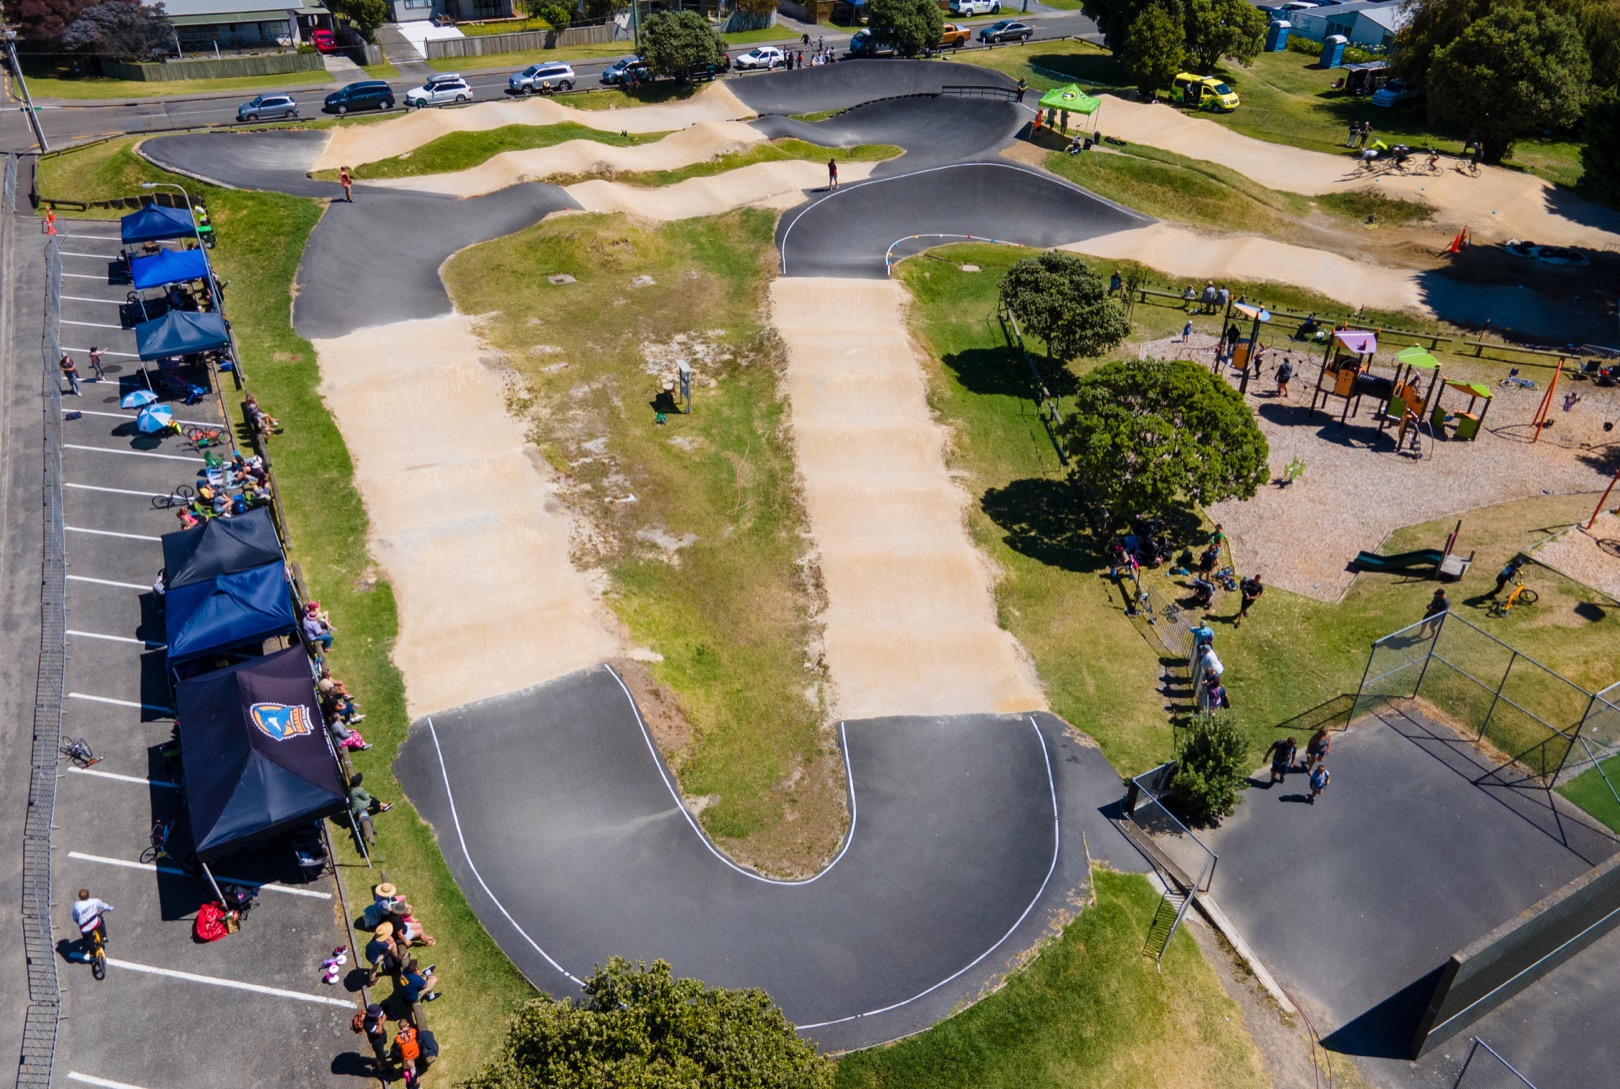
Spoiler alert – I managed not to crash. Came close a couple of times though!
I had about 90 minutes of flying time with the three batteries I had, which allowed me to film a decent number of races. I took around 70 separate clips, ranging from a few seconds to a few minutes. Each race can take between 2 to 5 minutes from start gate to finish line depending on the age group of the riders.
I shot a mixture of 4k 60fps and 1080p 120fps sequences for what I hoped would be some great slow motion action. I also took a large number of still photos just to try and get some perspective of the track.
In retrospect I realise one of the things I could have done much better was to have properly planned the shots and sequences I wanted to capture with a view on the final video. But I didn’t – instead I just rocked up and flew around a lot hoping something would come together. This made life in edit phase much harder and time consuming. But on the other hand, it was quite freeing just to scoot around and try things, and this was a largely experimental exercise – I didn’t really go into it thinking I was going to make a full video afterwards.
Creating the Video
After downloading all the clips to my laptop, I was keen on producing some kind of short video with a combination sequences. I had no real vision of what the end result would be, but I did want to include a few elements:
- An intro showing the racing arena
- Some sequences closely following the riders
- Some still images
- A music track
The final video was created using Adobe Premiere Pro, which I pay a monthly subscription for as part of Adobe’s Creative Cloud offering. I aim on writing a separate post about the video editing challenges, but a lot of time has passed since I created the original, so it may morph into a more generic post. I would say “watch this space”, but given the lack of frequency of posting on this blog, that may be a long wait!