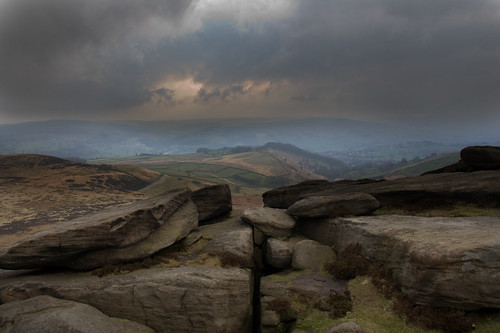
Following on from my previous post “Something from nothing“, this image uses a different technique to blend an overexposed sky with a detailed foreground. I nearly called it “Something a bit better from a little bit more”. This post is shorter than the earlier article, and hopefully less coma-inducing as a result.
The photo was taken from Heggar Tor in the Derbyshire Peak District last April in the early evening. This time I had the benefit of my Canon EOS 350D digital SLR, and captured in RAW format, which gives much more to play with in post processing. I also used slightly different software – Photoshop Elements 5 (or possibly 6 – I forget when I upgraded). The editing process still uses layers, but this time rather than overlay them using masks, combines them using blend modes.
The resulting image won’t win any prizes, but I rather like it. It may not be too obvious from the small image here, but if you click on the above image and select the larger version (via the “All sizes” button) you should be able to see some of the fine detail of the rocks and lichen.

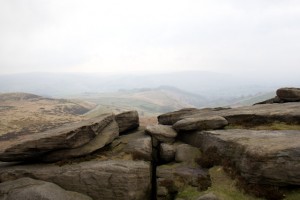
Original photo before post-processing
This time I deliberately chose my exposure to pick out all the detail. Since the direction of the view was towards the sun – albeit obscured in cloud – the sky suffers white-out.
Once I downloaded to my PC, I used Adobe RAW editor to save a version with the exposure cranked right down. This had the effect of bringing out the details in the clouds, and creating a brighter area where the sun is.

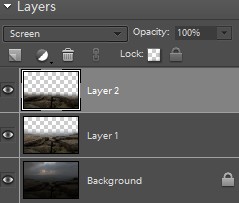
The three layers used here
In Photoshop I used this as a background layer, and then pasted in the image at the original as-shot exposure into a second layer. This is “Layer 1” in the screenshot. The blend mode was set to “Color Dodge” (yes, I know, American spelling….).
“Dodging and burning” are traditional photographic darkroom techniques for selectively over or under exposing parts of an image, and is something that digital processing has made much easier. No more subdued red lights in the understair cupboard, and shouting at the wife when she opens the door to ask what you want for tea just as you expose the photo paper. But I digress..
The effect of this mode is to make the picture lighter using the top layer to dodge the bottom layer. I also painted out the top of the picture using a semi-transparent brush to help pick out the midground, and thus restrict the region of the dodge.
The top layer also had a the top painted out, but not all the same parts as the previous one. All I did was to draw free hand over these layers to wipe out and blend bits until I liked the overall mix. I set the blend mode to “Screen” which – wait for it – multiplies the inverse of the top layer colour components with the bottom layer, and produces a much lighter image that retains all the fine detail.
And finally, all three together produced the first image of this post.

